Silicon Mold Making 101: A Beginner’s Guide to Crafting Flexible, Detail-Perfect Molds
Silicon mold making is a precise process crafting flexible, durable molds. Ideal for casting resins, wax, or plaster, it ensures intricate detail replication, widely used in crafts, prototyping, and small-batch production.
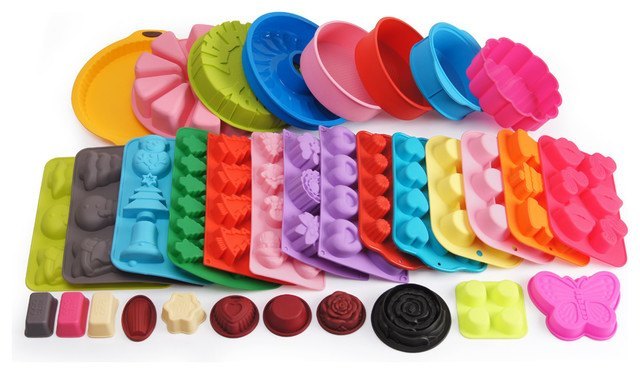
Table of Contents
1. Why Should Beginners Choose Silicone Mold Making?
2. Basic Prep: Essential Materials & Tools for Beginners (With Pitfall Warnings)
|
Category
|
Specific Items
|
Beginner Warning (Must Read!)
|
|
Core Materials
|
1. Silicone (1:1 ratio, "beginner-friendly" label)2. Curing agent (often included with silicone)
|
❌ Avoid high-viscosity silicone: It’s thick, hard to mix, and traps bubbles—look for "low-viscosity" or "easy-pour" options. ✅ Stick to 1:1 ratio: Equal parts silicone and curing agent are impossible to mess up (no measuring cups with tiny lines!).
|
|
Basic Tools
|
1. Disposable mixing cups (plastic or paper)2. Disposable stir sticks (wooden or plastic)3. Release agent (spray or liquid)4. Plastic scraper
|
❌ Don’t use wet tools: Even a drop of water in your mixing cup or on your stir stick will ruin silicone curing—dry everything thoroughly first. ✅ Get disposable tools: Cleaning silicone off reusable tools is a nightmare; save time with cheap, one-time-use options.
|
|
Auxiliary Items
|
1. Mold box (DIY: cardboard box, plastic container, or foam tray)2. Disposable gloves (latex or nitrile)3. Paper towels
|
❌ Mold box too short: Your box must be 1-2cm taller than your prototype—otherwise, silicone will overflow, and your mold will be incomplete. ✅ Wear gloves: Silicone sticks to skin, and curing agent can irritate it—gloves make cleanup and handling easier.
|
3. Step-by-Step Tutorial: 5 Simple Stages from Prototype to Mold
Step 1: Prepare Your Prototype (The Foundation of a Good Mold)
- Choose the right prototype: Pick something with a smooth surface (e.g., a polymer clay charm, a clean plastic toy, or a polished stone). Avoid porous materials (like unglazed ceramic or wood) unless you seal them first—porous surfaces soak up silicone and ruin details.
- Clean it thoroughly: Wipe the prototype with rubbing alcohol (70% or higher) and a paper towel. Dust, oil, or dirt will get trapped in the silicone, so make sure it’s spotless.
- Apply release agent (if needed): For non-porous prototypes (plastic, resin, or metal), lightly coat the surface with release agent (a quick spray or a thin wipe with a cloth). This prevents silicone from sticking to the prototype—skip this step for porous prototypes (like clay), as they don’t need it.
Step 2: Mix Silicone & Curing Agent (No Math Required!)
- Set up your workspace: Lay down paper towels to catch spills. Put on gloves.
- Measure the silicone: Pour equal amounts of silicone base and curing agent into separate disposable cups (e.g., 50ml of each for a small mold). If you’re unsure how much you need, fill your mold box with water first—this tells you the volume of silicone required (dump the water, dry the box, then use that amount of silicone).
- Mix thoroughly: Pour the curing agent into the silicone base. Use a stir stick to mix in the same direction (clockwise or counterclockwise) for 2-3 minutes. Scrape the bottom and sides of the cup—unmixed silicone will stay sticky and never cure.
- Let it sit (optional): If you see small bubbles, let the mixture rest for 1-2 minutes—some bubbles will rise to the surface and pop on their own.
Step 3: Pour Silicone into the Mold Box (Avoid Bubbles!)
- Place your prototype in the center of the mold box. Make sure it’s standing upright (or in the position you want to copy) and won’t tip over. If needed, use a tiny bit of clay to prop it up (just don’t cover any details!).
- Pour the silicone slowly along the edge of the mold box (not directly onto the prototype). Pouring along the edge lets the silicone flow gently around the prototype, pushing air out and reducing bubbles.
- Fill the box until the silicone covers the prototype by 1cm. This ensures the mold is thick enough to be flexible but not too thin (thin silicone tears easily).
- Tap the mold box: Gently tap the sides of the box on your workspace 2-3 times. This helps any trapped bubbles rise to the surface. If you see big bubbles, pop them with a toothpick.
Step 4: Wait for the Silicone to Cure (Patience = Perfect Mold)
- Find a good spot: Place the mold box in a cool, dry area with a temperature of 20-25℃ (68-77℉). Avoid direct sunlight, heaters, or air conditioners—extreme temperatures make silicone cure too fast (cracking) or too slow (taking 12+ hours).
- Let it cure: Leave it undisturbed for 4-6 hours. To check if it’s ready, gently press the surface of the silicone—if it’s firm and doesn’t leave a fingerprint, it’s cured. If it’s still sticky, wait another hour.
- Optional: Tap again halfway through: After 2 hours, lightly tap the box again—this helps the silicone settle further into the prototype’s details.
Step 5: Demold & Trim (Finish Your Mold)
- Remove the mold from the box: If you used a cardboard box, simply tear the box away. If you used a plastic container, gently flex the container’s sides to loosen the silicone, then pull the mold out.
- Demold the prototype: Hold the silicone mold with one hand and gently pull the edges away from the prototype. Then, slowly peel the silicone off the prototype—start from the least detailed side (e.g., the bottom of a figurine) and work your way around. The silicone’s flexibility will let you peel it off without breaking the prototype.
- Trim the edges: Use sharp scissors to cut off any excess silicone (the "flaps" around the mold’s opening). This makes it easier to pour casting materials later and gives your mold a clean look.
4. Common Beginner Questions: 3 Solutions to "Been There, Done That" Mistakes
Q1: My silicone mold has tons of small bubbles—they’re ruining the details. What did I do wrong?
- Why it happens: You mixed too fast (whipping air into the silicone) or poured directly onto the prototype (trapping air).
- Fix it next time:
-
- Mix slowly: Stir the silicone and curing agent at a steady pace—no fast, circular motions.
-
- Pour along the edge: As we mentioned in Step 3, pouring along the mold box’s edge lets air escape.
-
- Vibrate the box: After pouring, hold the mold box and gently shake it side to side (or tap it firmly on the table 5-6 times)—this forces bubbles to rise to the surface.
- Quick fix for existing bubbles: If your mold has small bubbles, you can still use it! When pouring casting material (like resin), fill the mold slowly— the material will fill the bubbles, and the final casting will still look good.
Q2: The silicone stuck to my prototype—I can’t get them apart without breaking one. Help!
- Why it happens: You didn’t use release agent on a non-porous prototype (plastic, resin, metal). Non-porous surfaces don’t absorb silicone, so the silicone bonds to them.
- Fix it next time:
-
- Always use release agent for non-porous prototypes: A quick spray (like mold release spray from a craft store) or a thin wipe with petroleum jelly (yes, it works!) will create a barrier between the prototype and silicone.
-
- Let the release agent dry: Wait 10 seconds after applying release agent—wet release agent can mix with silicone and ruin it.
- Quick fix for stuck prototypes: If they’re still stuck, dip the mold and prototype in warm (not hot) water for 30 seconds. The heat will soften the silicone slightly, making it easier to peel off.
Q3: My mold tore after 2 uses—it’s too flimsy. How do I make a more durable mold?
- Why it happens: You used low-quality silicone (no "high tear strength" label) or pulled the mold too hard during demolding.
- Fix it next time:
-
- Buy "high tear strength" silicone: Check the product label—this means the silicone can stretch without tearing. Most beginner-friendly silicones (like those from brands like Smooth-On or Mold Max) have this feature.
-
- Demold gently: Don’t yank the mold off the casting—peel it slowly, starting from the edges. If the casting is stuck, flex the mold slightly to release it.
- Quick fix for small tears: If your mold has a tiny tear (less than 1cm), you can patch it with a small piece of uncured silicone. Apply the silicone to the tear, smooth it out, and let it cure for 4 hours—good as new!
5. Wrap-Up: Creative Uses for Your Silicone Molds
- Resin Keychains: Mix clear or colored resin (add glitter for extra sparkle!), pour it into your mold, and let it cure for 24 hours. Pop it out, add a keychain ring, and you’ve got a custom accessory—great for gifts or personal use.
- Wax Candles/Melts: Melt soy wax (it’s easy to work with!) and add a few drops of essential oil (lavender, vanilla, or citrus). Pour into your mold, insert a wick (for candles), and let it cool. You’ll have homemade candles that smell amazing—perfect for your home or as gifts.
- Plaster Fridge Magnets: Mix plaster of Paris with water (follow the package instructions— it’s like making pancake batter!), pour into your mold, and let it dry for 2-3 hours. Sand the edges if needed, paint it with acrylic paint, and glue a magnet to the back. You’ll have cute, custom magnets for your fridge.

Dongguan Sanlixin Plastic Technology Co.,Ltd
Shenzhen Sanlixin Technology Co., Ltd. and Dongguan Sanlixin Plastic Technology Co., Ltd. is a manufacturer integrating precision plastic mold design, mold opening, single (double) color injection molding, IML injection molding processing, producing various single (double) color, IML process high-end appearance decorative structural parts, two-color buttons, USB dust plugs, panels and other plastic products, providing customers with fast, excellent, Midea all-round service, the company has 15 years of experience in precision plastic mold design, processing and production, with a variety of advanced machine injection molding equipment with excellent quality and fast service to win the trust and strong support of our customers.
5 Reasons Why Electric Body Massage Machines Are Becoming a Must-Have for Home Self-Care
From industrial parts to daily necessities: How does Custom Plastic help products get rid of "homogenization"?